
 |
DIAL
UP NETWORKING SET UP INSTRUCTION
(For Window 95/98)
Go to my computer, dial-up networking.
** If dial-up networking is not
visible, it must be installed. In
control panel double click "add remove programs" (have
your Windows CD ready, if your source files are not on the hard drive).
Choose Windows setup, communications, press the details
button. Make sure that the dial-Up Networking is checked.
Click OK twice to close dialog box and dial up networking will be installed.
**
- Double click on Make new connection
- Type a friendly name, like "Digital Rain" for
the computer you are dialing:
- Ensure that your modem is selected in "Select a device"
area. If no modem device is present, Windows will install it. Have
your Windows CD or the CD that came with your modem ready in case
it is needed for the installation of the modem. If you don’t
know the name of your modem let Windows auto detect. Follow the steps
to finish the installation.
- Click on Next
- Area code: type <604>; telephone number: type <604-899-8995>
Select the country code, i.e. Canada (1) Note that "604"
appears in BOTH boxes, due to 10-digit dialing in BC.
- Click on Next and click on Finish
- Now you should see the Digital Rain icon that you just created.
- Click the right mouse button and choose properties.
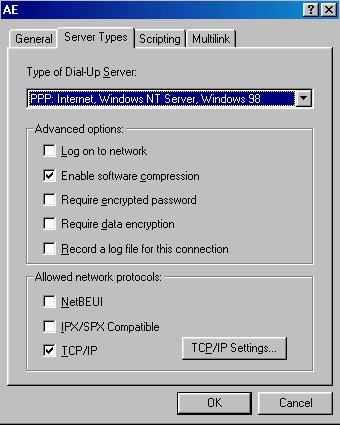
- Go to server types
- Uncheck every checkbox except ‘enable software
compression’ and ‘TCP/IP’ (See picture).
- Click on TCP/IP Settings button.
- Check server assigned IP address
- Check server assigned name server addresses
- Both check boxes should already be checked at the bottom.
- Click okay twice to exit.
- To create a shortcut on the desktop, right-click the Digital
Rain icon in Dial up networking. Choose "Create Shortcut"
A box will popup, asking if you want to create a shortcut on the desktop.
Select "yes".
DNS CONFIGURATION
- Go to My Computer , Control Panel , Network , then
Configuration
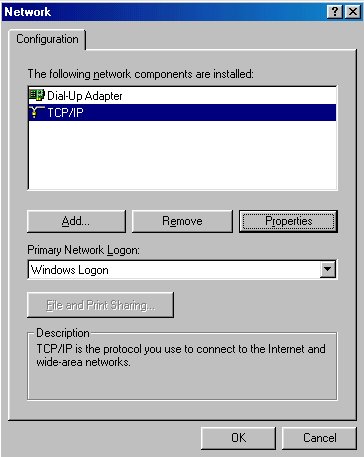
- If your computer is a stand alone computer you need only a Dial-up
adapter and TCP/IP. Be sure to remove the network components IPX/SPX
and NetBUEI if they are visible in the Network Dialog box.
- Choose TCP/IP , then click on Properties
- Click on DNS Configuration
- Check Disable DNS
- Click on OK
If you cannot find TCP/IP,
you have to add it. Please follow the steps below.
- Click on Add
- Choose Protocol, click on Add
- Choose Microsoft, then choose TCP/IP
- Click on OK
- Click on OK again and then Yes to restart the computer, and start
from step 1 again.
DIALUP CONNECTION
CONFIGURATION
- Double click your Digital Rain shortcut
- In the User name area, enter your username followed by "@on-track.ca"
Please note, this is NOT your email address. This extension is used
only for the authentication server, as part of the our extended features,
including online hours checking. Also, all entries are case sensitive.
Please do not use capitals unless instructed.
- Enter your password
- Check "Save password", unless you want to enter it every
time, for security.
- Confirm the phone number is 6048998995.
- Click "Connect". The data you have entered will not be
saved by Windows until you successfully connect for the first time.
- When the little icon that looks like two little monitors appears
in the bottom right hand corner of your screen, you are connected.
To disconnect, right-click that icon, and choose "disconnect"
Up
|
